
Following taken from:
http://antarcticsubmarine.blogspot.com/2009/11/create-round-corners-in-photoshop.html
http://antarcticsubmarine.blogspot.com/2009/11/create-round-corners-in-photoshop.html
How to create round cornered rectangles in Photoshop - a more flexible and "tweaking-friendly" way than using the rounded rectangle tool
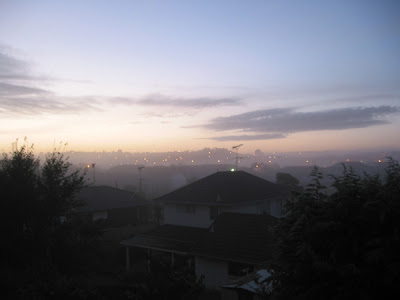
Here's the picture we want to add round corners to:
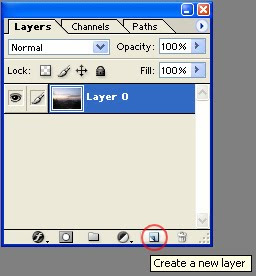
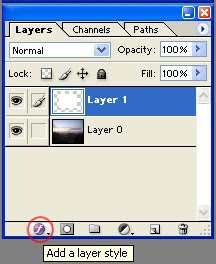
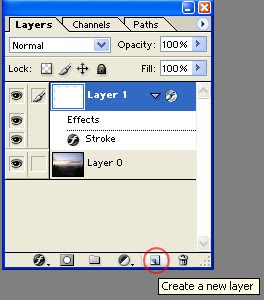
1. click create a new layer (we'll call this new layer Layer1 from now on)
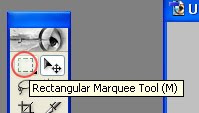
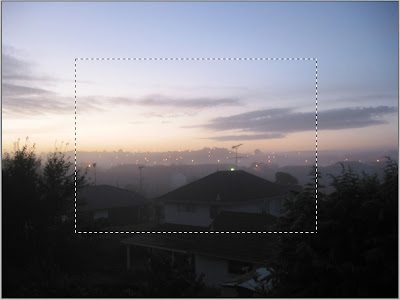
2. rectangular marquee > draw a rectangle on Layer1 > fill it with any color you like

3. Add a Layer Style > Stroke
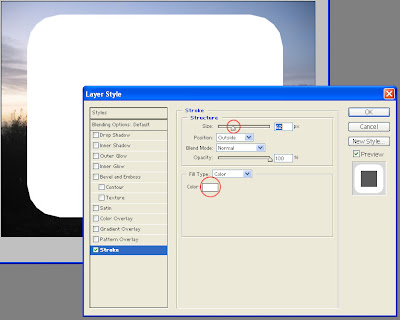
4. Change the color of the stroke; then change the stroke width
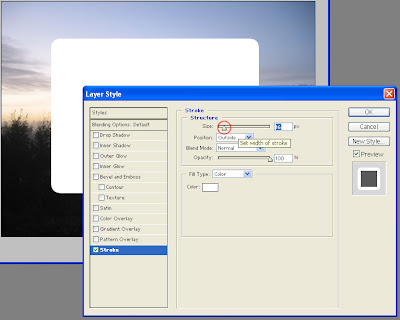
5. Adjust the stroke width to your liking, then click OK
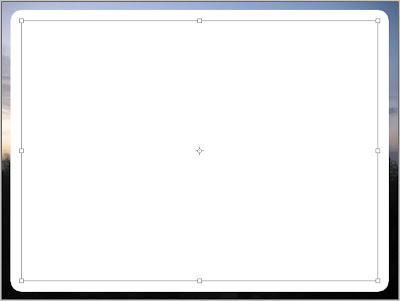
6. Press "Ctrl + T" (or Top panel > Edit > Free Transform); adjust the size of the rectangle to your liking.
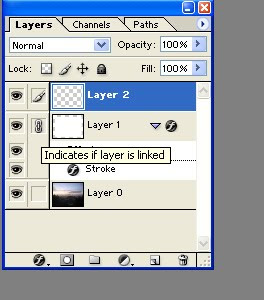
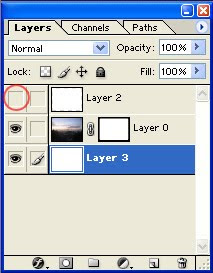
7. Create another new layer
8. Select both Layer 1 and 2, press "Ctrl + E" to merge them. This will make the stroke effect permanent (and un-editable from now on).
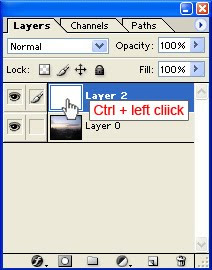
9. Ctrl > left-mouse-click on the thumbnail area of the merged layer
10. Left click on the picture layer, then click "Add Layer Mask"
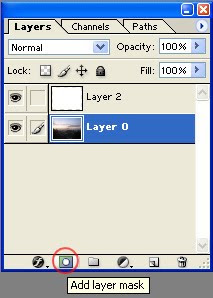
11. Turn off the visibility of Layer2, and Voila. Now you have a rectangle picture with rounded corners. You can then create a new layer (layer 3 in this image), fill it with any color, and place it underneath the picture layer.
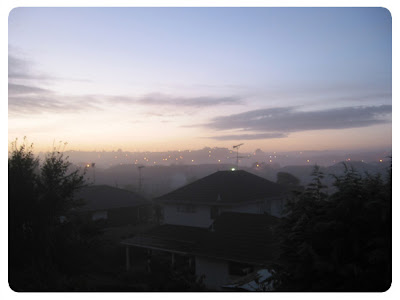
Here's the picture we want to add round corners to:

1. click create a new layer (we'll call this new layer Layer1 from now on)

2. rectangular marquee > draw a rectangle on Layer1 > fill it with any color you like


3. Add a Layer Style > Stroke

4. Change the color of the stroke; then change the stroke width

5. Adjust the stroke width to your liking, then click OK

6. Press "Ctrl + T" (or Top panel > Edit > Free Transform); adjust the size of the rectangle to your liking.
7. Create another new layer

8. Select both Layer 1 and 2, press "Ctrl + E" to merge them. This will make the stroke effect permanent (and un-editable from now on).

9. Ctrl > left-mouse-click on the thumbnail area of the merged layer

10. Left click on the picture layer, then click "Add Layer Mask"

11. Turn off the visibility of Layer2, and Voila. Now you have a rectangle picture with rounded corners. You can then create a new layer (layer 3 in this image), fill it with any color, and place it underneath the picture layer.

